Creative Memories' Custom Cutting System is a must-have for any serious scrapper in my opinion (they also come in handy for other crafts around the house, as well as homework projects or teachers' bulletin boards.) The self-healing mat and the three blades are essential, and you can collect patterns as you go. The patterns currently for sale are the circles, the ovals, and the jumbo hexagon. It is important to realize that each individual pattern alone yields six different-sized shapes. In other words, you may be buying a pack of four ovals but you are really getting 24 different-sized cuts - talk about getting your money's worth! Because the patterns you cut are identical in shape, just slightly smaller or larger than the previous size, you can make a perfectly concentric mat around your photos with some cardstock and a second blade. You can even make a double mat around the outside of your photo and your original mat, and you can also make miniature circles and ovals by using the hole in the center of each pattern.
 |
| One pattern makes six sizes with the use of the red, green and blue blades |
 |
| Cut on the inside to make small decorative shapes, cut on the outside to make large shapes and mats for your pictures |
 |
| The "teeth" that go into the grooves of the pattern are 1/16 of an inch (the red), 3/16 of an inch (the green) and 5/16 of an inch (the blue) away from the blade, and they actually swivel as you are making cuts to enable smooth moves around the corners of the patterns |
 |
| I love the "truffle-like" shape of these blades - they are larger than the old model and are easier on the hands |
 |
| These guides show you all of the options you have with your circle and oval patterns. You obviously have a lot of choices! |
The custom cutting system is easy to use on both photos and paper. The trick is to apply constant pressure all the way around the pattern and to keep going in the same direction rather than reversing course if you make a mistake. Now I'd like to share a few ideas I came up with!
Our World is Full of Circles and Ovals
Circles and ovals are all around us, and it is fun to see how infinite the possibilities are to be creative with these patterns. What can you think of to do with the circle and oval patterns? Circus balloons? Dinosaur eggs? Easter eggs? Baseballs? It is so easy to add fun embellishments to your pages with just a little bit of imagination, a pen and some cardstock. Here are some ideas I came up with this weekend - I am excited about them!
 |
| A caterpillar |
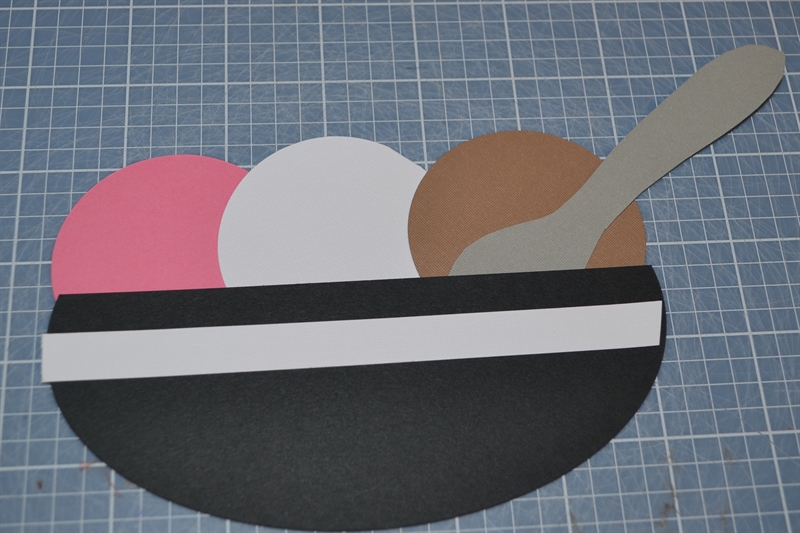 |
| A bowl of Neopolitan ice cream |
 |
| Citrus slices using CM's card stock and the Trick or Treat paper pack with a few lines drawn using a black dual tip pen |
 |
| A new lemon tree, a shopping trip to the grocery store, making lemonade or even a fun beach page could be made a lot cuter with these tasty "half circle" lemon, orange and lime wedges. |
 |
| I love to make gingerbread houses every year with my family, and what better a way to commemorate the occasion than with a scrapbook pages with this cute little design? All of the cardstock in this gingerbread house came from Creative Memories' "Shades of" packs (Neutral, Pastel, Green, and Bright) and I had fun making the meltaway mint nonpareils out of the center of the smallest circle using the blue blade. I used the newest Border Maker System cartridges, Evergreen and Lace Flower Chain, for the bushes in front of the gingerbread house and the royal icing. Fun! |
 |
| Circles and ovals together in perfect harmony |
Scrapping the Obvious
Mats are probably the most popular use of the circle and oval patterns and with good reason. They are an easy way to add crisp lines and a splash of color to your page, and the custom cutting system makes it so easy to be perfect (I can't believe I used to try to cut circles out by hand!)
 |
| By using the red blade for the photo, the green blade for the first mat and the blue blade for the second mat, you can have a very crisp look to your page. |
In addition to mats, you can also use the shapes you make using the Custom Cutting System circles and ovals as stand alone additions to your page as I did here with some of our beautiful cardstock. When searching for page inspiration, I like to look at what's "obvious" in an event that I want to document - in this case, I was commemorating a birthday party with a pit full of balls. Doesn't get much simpler than that when it comes to idea generation for the circle patterns!
 |
| While the system is accessible, make the most of your time and cut out a bunch of circles at once! |
 |
| I admit it's very obvious to use circles as balls, but I couldn't resist with this birthday party page. It was just too perfect! |
How will you use your circles and ovals? I'd love to hear your thoughts in the comments below, and I hope you've been inspired to come up with some fun ideas of your own. Please check out Noreen's blog next OrganizedAndCreativeMom for more great thoughts and until you're here again, keep scrappin'! Fran
In case you missed anything here is the complete list of blogs:
Stop #1 to get you started on the right foot with Julie Tambrini!Julie'sCMBlog
Stop #2 with our border queen Diana Brinsley! DBrinsleysBlog
Stop #3 with card and F2F designer extraordinaire Stefani Jones! CropwithStef
Stop #4 with the very creative Lisa Graham Brown! LisasWorkshop
Stop # 5 You are here with me, Fran Smitherman! CelebratingYourBeautifulLifeStop # 6 Meet our newest blogger from Canada, Noreen Smith! OrganizedandCreativeMom
Stop # 7 And last but certainly not least, the amazing Candace Bouldin! ScrappinJpegs
Love the citrus slices. So colorful! Great use of that paper.
ReplyDeleteThanks Candace! I had fun coming up with that one and thinking outside the box with Halloween paper - I actually did a blog post a little bit ago about combining unexpected paper packs :) I buy all of CM's paper packs when they come out because you never how you might use them.
DeleteI love the gingerbread house!
ReplyDeleteI'm so flattered Julie! I was pretty happy with it myself (I'm not usually as creative as the other bloggers so that one felt good!)
Deletelove the citrus and the ice cream - very creative ;)
ReplyDeleteThanks Erica! I brainstormed on everything I could think of that was round or semi-circle and those were a few of my favorite creations. Glad you stopped by!
DeleteI love all the simple circle and oval designs! So true, our world is full of circles and ovals!
ReplyDeleteYou just have to look around you for inspiration :) Thanks for stopping by Becky!
DeleteThis comment has been removed by a blog administrator.
ReplyDeletecitrus slices very nice good to see the Caterpillar too
ReplyDeleteThank you Kathryn - it seemed to me like those were ideas that could get traction all year long
Deleteclever on the gingerbread house
ReplyDeleteSuch great ideas!! I love the gingerbread house <3 Thanks for sharing!!!
ReplyDeleteLisa I was trying to take it up to your level with that one! I was happy with it too - now I need to make your cute little gingerbread people to go with my cookie pages this year!
DeleteI like the slices of citrus! A perfect way to dress up a few of my summer pages!
ReplyDeleteThey were fun to make! Hard to believe I used the recent Halloween paper for the "pulp" -you never know what paper is going to come in handy so it's best just to buy it all, haha!
DeleteLove all the ways you've used the shapes. Have to make the ice cream bowl for my daughter. When she was little she would ask when we were going to Grandma's so she could have "Napolean" ice cream!!! And she still calls it Napolean, LOL!
ReplyDeleteCute! Yes it sounds like you have to make it for sure now :) I used the oval for the bowl and obviously circles for the ice cream - I just free cut the little spoon. Thanks for stopping by
DeleteThank you for sharing!
ReplyDeleteIt's my pleasure Gina - thanks for stopping by and we will continue to share in 2016
DeleteFun ideas!
ReplyDeleteThank you - I had fun making them and I hope you will too!
DeleteVery cute ideas!!
ReplyDeleteThank you so much Margrethe! I am so glad you were able to visit - we will try to keep the cute ideas coming in 2016
DeleteYou are so talented. Thanks for sharing.
ReplyDeleteI don't know about that :) but thank you for your warm thoughts - so glad you enjoyed them.
Deletecute ideas thanks
ReplyDeleteYou are so welcome and I am just glad you were able to stop by!
DeleteFrom Alison H. - Fran your ideas were great!!! Love..love...love the citrus slices and the ice cream. You are over the top creative. I just did the blog hop. It was great to see all of the creative ideas.
ReplyDeleteThanks Alison! If this is the Alison I think it is I certainly PALE in comparison to you!
ReplyDelete