Saturday, October 24, 2015

Digital Sale and New Updates at Forever!

Greetings to all of my digital friends! I have a lot of exciting news for you today, not the least of which is a 25% off sale on Historian (formerly Creative Memories' Memory Manager) that goes on until Tuesday, October 27th! If you go to the banner on the right hand side of my blog and click on the "Purchase Historian" banner you can use the code GetHistorian to knock 25% off of the price. Sweet deal!


You can also use the code GetArtisan to save $20 on Artisan 5 (formerly Storybook Creator.) This code lasts until October 31st so don't let it pass you by! You may have to do separate transactions to take advantage of both codes.


I have made so many wonderful projects (12X12 hardbound storybooks, 12X12 and 8X8 page prints, invitations, softbound books, greeting cards, etc...) in this software program that I find it to be as indispensable as Historian (my secret to keeping my 90,000 photos accessible and in order!) They go together like peanut butter and jelly!

 For those of you who already own the new versions of the software, did you know that yesterday they came out with great FREE updates for Historian, Artisan 4 and Artisan 5? You should be able to launch them from your software's start page - let me know if you need help. 

Please know that as of December 31, 2013 Storybook and Memory Manager have not been supported or updated so with every Windows upgrade (or with the possibility of your own computer running into trouble) you run the risk of losing what you have. I would strongly advise you to upgrade to the new Historian and Artisan software programs. Last summer I did it myself and was so pleased that I was able to do both seamlessly without losing my artwork, my photo descriptions or my folders!  If you have never owned either Historian or Artisan, now is a great time to get them!

Update on Forever

So now that we've gotten through the most important sale info, I hope you will stick around for another minute to learn about Forever. When Creative Memories filed for bankruptcy and came back as a leaner, simpler company, they decided not to pursue digital. Panstoria (the designer of Creative Memories' Storybook Creator and Memory Manager)  introduced an affiliate program for people like me who still wanted to support their folks who loved digital. Not long after that, Panstoria was purchased by Forever, the world's first permanent online cloud storage platform for your memories. 


I went to their conference in September and was blown away by their Forever Guarantee Fund and the insurance-like nature of their product. With three servers and full encryption, backed by an endowment, Forever is guaranteeing the availability of your photos (and soon videos and documents such as wills birth certificates, etc...) in the cloud forever with COMPLETE PRIVACY. You pay upfront or in installments and unlike Shutterfly, Facebook, DropBox, Google, and Flicker, there is no threat of your account being wiped out if you go "inactive" or them selling your info and shrinking your resolution. 

So now my best and favorite memories are in my Forever account - you can get your first 3 gigs for free (about 1000 photos) so I would encourage you to go to Forever.com to setup your account. If you want to add more storage or try out their other offerings I am now a Forever Ambassador so just enter my name when doing your transaction (I also have links right here on this blog under "My Favorite Things.") Thank you as always for your support of my small business so I can keep us all updated and up to speed.  

Forever is also offering an online project program (Forever Projects), media digitization (videos, scanned photographs and scrapbooks, etc...) and of course Historian and Storybook.  If you want to be an Ambassador yourself you have until October 31st to do so without buying a $149 starter kit (message me for details.) I am proud and excited to be a part of this company and sleep better at night knowing that I will have my best memories safe from fire, floods, computer crashes, EHD crashes, or websites such as Shutterfly or Facebook selling my information and shrinking the resolution of my images (not to mention wiping everything out to make room on their server should I not buy anything from them.) Forever is the future - please check them out! There are links to my Forever site under "My Favorite Things" -thanks as always for your support


Comment below if you need help with anything and as always keep scrappin'! Fran

Fran Smitherman, CM Advisor and Forever Ambassador


Helping people get their photos in order, in albums and permanently preserved since 2002! Whether you prefer traditional or digital albums or you simply want the security of knowing your memories have a permanent home in the cloud, I have solutions for you. 

Sunday, October 18, 2015

Halloween Blog Hop Stop #5

Welcome to Stop #5 of our Creative Memories Halloween Blog Hop! 

Isn't Halloween fun? I love being a part of this blog hop with my fellow CM Content Contributors - what a creative group of ladies! Today I am going to share some ideas I came up with a few months back that I hope you will be able to use yourself. My projects are pretty simple if you have the right tools (and I try my best to use scraps so nothing gets wasted!) Today we are going to work on some spooky Halloween faces and a two page layout featuring "Spooky Eyes." Let's get started!

Spooky faces using CM cardstock, the Shape Maker System and scraps from the Border Maker System's Film Strip cartridge  

A fun layout using CM cardstock, jewels from the Floral Embellishment kits, Gold ABC/123 letter stickers, and the fence that comes with the Border Maker System
1. Spooky Skeleton and Spooky Pumpkin

To get started, you will need the Custom Cutting System's mat and the green blade, a tape runner, and the Jumbo Hexagon Pattern. You will also need the Shape Maker System with the Square and the Fancy Circle cartridges and the Border Maker System with the Film Strip Cartridge. For paper I used our Shades of Bright and Shades of Neutral Cardstock packs to get my orange, black and white cardstock (one sheet of each.) Right now Creative Memories also has for a limited time 10 sheet packs of White and Black cardstock (not a bad idea - I know those are two colors I use a lot of!)

The CM custom cutting system, blades, mat and tape runner
                                      

Creative Memories tools: The Border Maker System and the Shape Maker System


"Shades of" cardstock packs and Flower and Jewel Embellishments


One sheet each of black, white and orange cardstock

Begin by using your Green blade to make the smallest hexagon possible with the inside of the Jumbo Hexagon Pattern. Do this with both the Orange (the pumpkin) and the White (skeleton) cardstock.


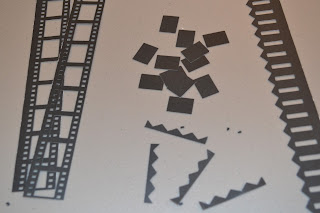
 Next, take your black sheet of cardstock and make two film strip borders. Save the scraps!


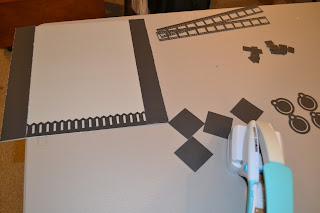
Finally, using the Shape Maker System and the rest of your sheet of black cardstock, make four Fancy Circles and two squares. Cut the squares in half to make triangles.


Assemble the pieces you have cut as follows - the Fancy Circles are the eyes, the triangles are the noses and the cheekbones, and the rectangles that were the scraps from the film strip cartridge border become the mouths. Adhere with your tape runner and voila, you have a Spooky Skeleton and a Spooky Pumpkin!

Spooky faces using CM cardstock, the Shape Maker System and scraps from the Film Strip cartridge (used with the Border Making System)
 2. Spooky Eyes

My second project came from being the mother of two boys. I loved the paper flowers and the jeweled embellishments, but struggled with how I could use them for my pages. After staring at the adhesive jewels I realized they could be used as spooky eyes staring out from the dark and that is what I did to create this fun layout! I used a sheet of grey cardstock from the Shades of Neutral cardstock pack  - the black picket fence from the Border Maker system and the Gold ABC/123 letters as a title added a little something extra!


I hope you are enjoying all of these fun ideas for your Halloween pages.  Now it's time for you to go see what Diana has brewed up for you at Stop 6 on this Blog Hop, Diana Brinsley's blog. If you started at my blog but want to see the previous Halloween ideas, here are all the links:

Stop 3 Scrappinjpegs
Stop 4 LisasWorkshop


Enjoy the rest of the blog hop and as always, keep scrappin'! Fran


Thursday, October 15, 2015

Themed Albums Part 2: Halloween

Halloween is my favorite holiday! I never miss the opportunity to make the most of it, and the beauty of the season combined with the fun decorations and costumes make for some of the best photos all year. 


While I love all holidays, there seems to be a little more frivolity and a little less work involved in Halloween as there is less pressure to travel, prepare large feasts or to select the perfect gift for people. To add to the fun, Creative Memories has launched some fun new tools, seasonal coversets, cardstock sets, ABC stickers and matching Halloween paper and sticker packs  that make it easy to get inspired to do something special with your favorite spooky memories. Before we get into the subject of themed albums, take a peek for yourself! All are available on my Creative Memories website or that of your favorite consultant.


I am in love with our 12X12 paper packs - not only are they cute and photo safe, but they are also double sided and a great value. With 12 sheets of double sided paper you get 2 of each sheet, or 12 unique designs. The matching "Trick or Treat" stickers add the perfect accent.


Creative Memories scores again with another wonderful paper pack and sticker set. The theme here is "Trick or Treat" and they are available for a limited time. 
Halloween itself is purely fun and low pressure, similar to the themed albums I am talking about in this blog series! 

This is the second in a series of blog posts on themed albums, a type of scrapbook that is near and dear to my heart as the topic is finite and you don't have to mentally change gears as often as you do with a regular "chronological" album. Two of my favorite albums under my coffee table are my Halloween and Christmas albums. I only have to work on them once a year, yet they are a great way to remember gifts,traditions and costumes and which year they took place in. With both I have created a cute start page at the beginning of the album, and then I allow myself about four sides a year in a 12X12 Creative Memories album to tell the story of each year. The hardest part of all of it is narrowing down the stack of photos to about 20 or so a year to pull this off. It takes some restraint (I take enough pictures each Halloween to complete an entire album, haha!) but the end result is worth it!


A fun start page is a great way to begin a themed album


A few favorite photos, the year and some captions are the most important elements of your Halloween pages

Journaling can either take place in a journaling box or right there on the page, but make sure to do it while the memories are still fresh

Cutting out pictures is a great way to add more pictures to a page when you are working with an 8X8 album


It's fun to show pictures of who you are dressing as!

Creative Memories' metallic pens work the best on dark paper

Have you thought about starting a Halloween themed album yourself? It's never to late to do so.  I plan to work on these books until the boys are 18 and I have figured out how many pages I can do each year to accomplish that (4 sides each year for a complete 12X12 Creative Memories album.)  Right now Creative Memories has an adorable 12X12 Halloween coverset for sale - it is limited edition so hurry and get one before it's too late! If you are hungry for more fun ideas then stay tuned for our upcoming "Halloween Page Blog Hop" on October 19th and my next blog post on themed albums will feature the holidays in December. Thanks for reading! Fran
Limited edition Creative Memories 12X12 Halloween coverset - get one while they last!  Don't forget your refill pages, page protectors and the accompanying paper and sticker pack! Click on the CM banner on the right of my blog or shop from your favorite Creative Memories' consultant's website! 
Eggplant is a supper cool color for a Halloween album - I love apple green and purple together so this new coverset is very exciting to me! 


Monday, October 5, 2015

Journaling: The Power of the Pen

"If stories come to you, care for them. And learn to give them away where they are needed. Sometimes a person needs a story more than food to stay alive." Barry Lopez

Our pictures alone often only tell part of the story, and sometimes it's the tiny details that  aren't apparent from the image that will truly bring the memories to life. Journaling can often be the hardest thing to do when making albums, but it is a critical part of page completion  and one that should not be neglected. At the end of the day, it will be the stories and the photos that mean so much to you, not the embellishments and the paper choices you make, so try to at the very least include the who, what, when, where and why on your pages. These are often hard to remember as time passes which is why album making should be a part of your regular weekly regimen (just like exercise or grocery shopping), but if you can't make that work, keeping a journal is another good way to jot down things you worry will slip away. I often find myself accessing my journal to scrapbook because it's the tiny details that can get lost in the days and months that follow!

When making traditional scrapbook albums, I can think of several ways we can add journaling to our pages. I am sure there are many more, but I will talk about the following today:

1.) Titles made with bold tipped pens or ABC sticker letters
2.) Your own handwriting in caption form right on the page
3.) The creation of plain or decorative ruled journal boxes
4.) Full page spreads with nothing but your writing
5. )Print-outs of email messages or Facebook posts
6.) Detailed invitations or photos of venue/event signs

Titles
Let's start with the basics - the title of the page itself. Your handwriting in a bold pen is the easiest way to title a page, but you can also make it a bit more decorative using ABC letters or machine-cut letters on cardstock.


Your Own Handwriting on the Page
You don't need a formal journal box if you don't want one - feel free to write right there on your page. That is what is so great about the CM Group's white, spargo and natural refill pages. They provide a blank surface that you can use however you like to tell your story, and sometimes the easiest thing to do is to simply allow some room on your page to write around your photos themselves. At times I draw ruled lines to keep my handwriting in check, and other times I get creative and snip pieces of cardstock to make decorative shapes to journal on. I always make sure to only use the CM Group's acid-free and bleed resistant pens in my albums.


Journal Boxes
Placing journal boxes next to photos is a favorite method of mine. Some scrapbooking kits come with these or you can make your own using colored paper or cardstock. If your journal space is dark then  metallic silver or gold pens will be the best way to highlight your words.


Full Page Spreads of Writing
Quick captions are the most popular way to journal but sometimes you have a lot to say so a scrapbook page itself might be nothing but your own words. This type of page is pretty rare so don't be intimidated by it - you never know when you might need to do it yourself, however!

Typed Messages
Sometimes you've already told the story in print somewhere (perhaps in an email, on Facebook, or a blog post.) While your own handwriting is the preferred method of journaling as people who love you will love to see it, don't hesitate at times to print those pre-written words out and place them right there on the page! On other occasions I have incorporated page prints created digitally in my traditional albums for a sharp look.


Detailed invitations or photos of venue/event signs

Bring home the menu, save the invitation and take photos of venue signs if you want to be able to share the specifics of a certain event!


There are so many wonderful reasons to journal and so many ways to do it - can you think of any I haven't included here? Please feel free to share your ideas in the comments and as always, keep scrappin'! Fran