Monday, November 9, 2015

Mixing and Matching Paper Packs for Gorgeous Page Designs


When it comes to paper packs, Creative Memories is the top of the line. Their 12X12 paper is double sided and you get 12 different patterns to choose from in each pack. They are a fantastic value, and the only problem you might bump into is having to pick sides (literally!) Whether a paper pack is limited edition due to its seasonal nature (such as the Trick or Treat or Christmas Joy paper packs) or it is simply time to make room for new designs, these wonderful sets come and go so it is never a bad idea to grab a pack or two when you see one you like. Several favorites are on their way out right now so now is a great time to think of fun ways to use the ones you have (and possibly purchase a few more before they are gone!) The cute names such as "Sunshine Getaway", "Strut Your Stuff" and "Trick or Treat" make them fun to talk about but they are even more fun to use, especially when you combine multiple packs in your page layouts. That's what we're going to talk about here in this blog post. Resist the urge to "pigeonhole" a paper pack - you might surprise yourself with new uses for that patriotic or neutral paper that you thought were only good for the Fourth of July or wilderness pages. This is best demonstrated with photographs so let's see what I am talking about.

My first set of page ideas involves the Sunshine Getaway, Bright and Neutral paper packs. They work very nicely together as you can see in these photos:

Who knew that the Bright, Sunshine Getaway and Neutral Paper Packs could be so versatile? They look beautiful when you combine them on your pages.
The CM watercolor palette works well together, no matter what combination you decide to play with!

How about combining the burlap from the Neutral paper pack with some of the beautiful designs in this year's Christmas papers? Perfect for shepherds and the innkeeper's child if you ask me! 
Neutral Paper Pack Meets Christmas Joy!

Nice combination here!


Let's go even further out on a limb. Would you have expected to combine the Be Bold and Flourish paper pack with the Trick or Treat pack? That is what I did here with the bold combination of black polka dots and spider webs. I cut out some of the cute bats, ghosts and pumpkins from other papers from the Halloween pack to add just a little bit of fun to this Halloween page.


Trick or Treat Meets Be Bold and Flourish!

The Trick or Treat sticker set is super cute, but here I simply cut up some of the spooky critters from the paper pack to add to my page as embellishments


The Halloween paper also looks good with the black swirls from the Neutral pack...

Trick or Treat meets Neutral
...and believe it or not, this is the black from the Trick or Treat pack and the red ribbon stickers from this year's Christmas stickers (and holly from this year's Christmas slide in packs.) Halloween and Christmas in perfect harmony!

Halloween paper and Christmas Joy stickers and paper - who knew? 

I'm obviously obsessed because here I am back with the Sunshine Getaway pack! It is gorgeous for its large floral prints, but some of the "b" sides have more muted patterns such as this taupe page with scallops on it. The bolder prints here on this layout actually came from the Bright paper pack. I had fun using my Scallop Place 'n Punch and my Jumbo Hexagon pattern to make this page. 

Sunshine Getaway Meets the Bright Paper Pack Take Two


A two page spread using the Bright and the Sunshine Getaway paper packs


While the Red White and Blue paper pack is no longer available, I am assuming that some of you might still have it and want a fun idea for it. I am also trying to make the very important point that paper packs that you don't think are relevant to you (think Pastel paper pack for someone not having a baby) could have just the pattern you've been waiting for. What do you think of when you think of the Red White and Blue paper pack?

This is probably what you picture when you thought of the Red White and Blue Paper Pack


Bright patriotic  colors right? Stars and stripes? Just for the Fourth, right? Wrong! Turns out the Red White and Blue paper pack had tons of my very favorite pattern in the world - GINGHAM! I love it! Point being...just because it's a Halloween pack and you don't have trick or treaters, or just because it's a Red White and Blue pack and you don't have pictures from your most recent Veteran's Day parade, don't exclude the pack all together. Check it out - see if the patterns might appeal to you for "outside of the box" ideas! Here's one I came up with combining the Be Bold and Flourish pack and the Red, White and Blue paper pack. What do you think?


Would you have ever guessed this lovely soft blue gingham was inside the Red White and Blue paper pack (or that it would look so beautiful when combined with the gorgeous peach tones inside the Be Bold and Flourish paper pack?) 


I hope some of these ideas have appealed to you and that you might be encouraged to look through your own stash of paper packs to come up with interesting and unexpected combinations. Have a wonderful day and until next time, keep scrappin'! Fran
CM's Be Bold and Flourish Paper Pack


CM's Bright Paper Pack

CM's Christmas Joy Paper Pack - Ltd Ed.


CM's Trick or Treat Paper Pack - Ltd. Ed.


CM's Neutral Paper Pack

CM's Sunshine Getaway Paper Pack


Thursday, November 5, 2015

Holiday Blog Hop Stop # 4

Welcome to our Holiday Blog Hop featuring Creative Memories' wonderful new holiday products (and maybe a few old favorites!) If you arrived here from Lisa's page and the other Content Contributors' blogs, aren't the ideas wonderful so far? If you are starting here with mine, be sure and check out all the other blog posts (listed at the bottom with links) because they are INCREDIBLE.

 I just received my shipment of the new papers, slide in packs and stickers and they are absolutely gorgeous - I am already counting the days until my 14th annual Holiday Open House so I can show them off!

Creative Memories' 2015 Holiday Papers, Stickers, Slide-In Pack and the Evergreen Cartridge for the Border Maker System


Nothing highlights beautiful papers like fresh ideas so I have come up with some quick and easy ones to share with you today. I hope you enjoy them and find some inspiration to knock out some pages of your own!

 1.) Split your stickers in half!

Have you ever wanted to fit more pictures on your page but worried that some of your larger embellishments might take up too much room? Have you ever tried splitting them in two? This is a trick I love to use to make easy and fun borders with 12X12 paper.

Select two coordinating sheets of Creative Memories double sided paper or cardstock. Start by cutting one strip slightly wider than another, then adhere one to the other, centered. Layer some of your stickers down the middle.


 Using a straight cut, slice the border in half.


Adhere these two new borders to the edges of your page and use the rest of your double-sided paper to make mats and journaling strips!


A page layout featuring the "split the sticker' border technique

Maintain the integrity of your larger stickers by splitting them into two borders on a double page spread
 2.) Square Frames

I take a LOT of pictures so simple pages are my thing, combined with a desire to get as many pictures on a page as possible! How would you like to see a two page layout that is beautiful, yet can still accommodate 12 photos? Coming up right up!

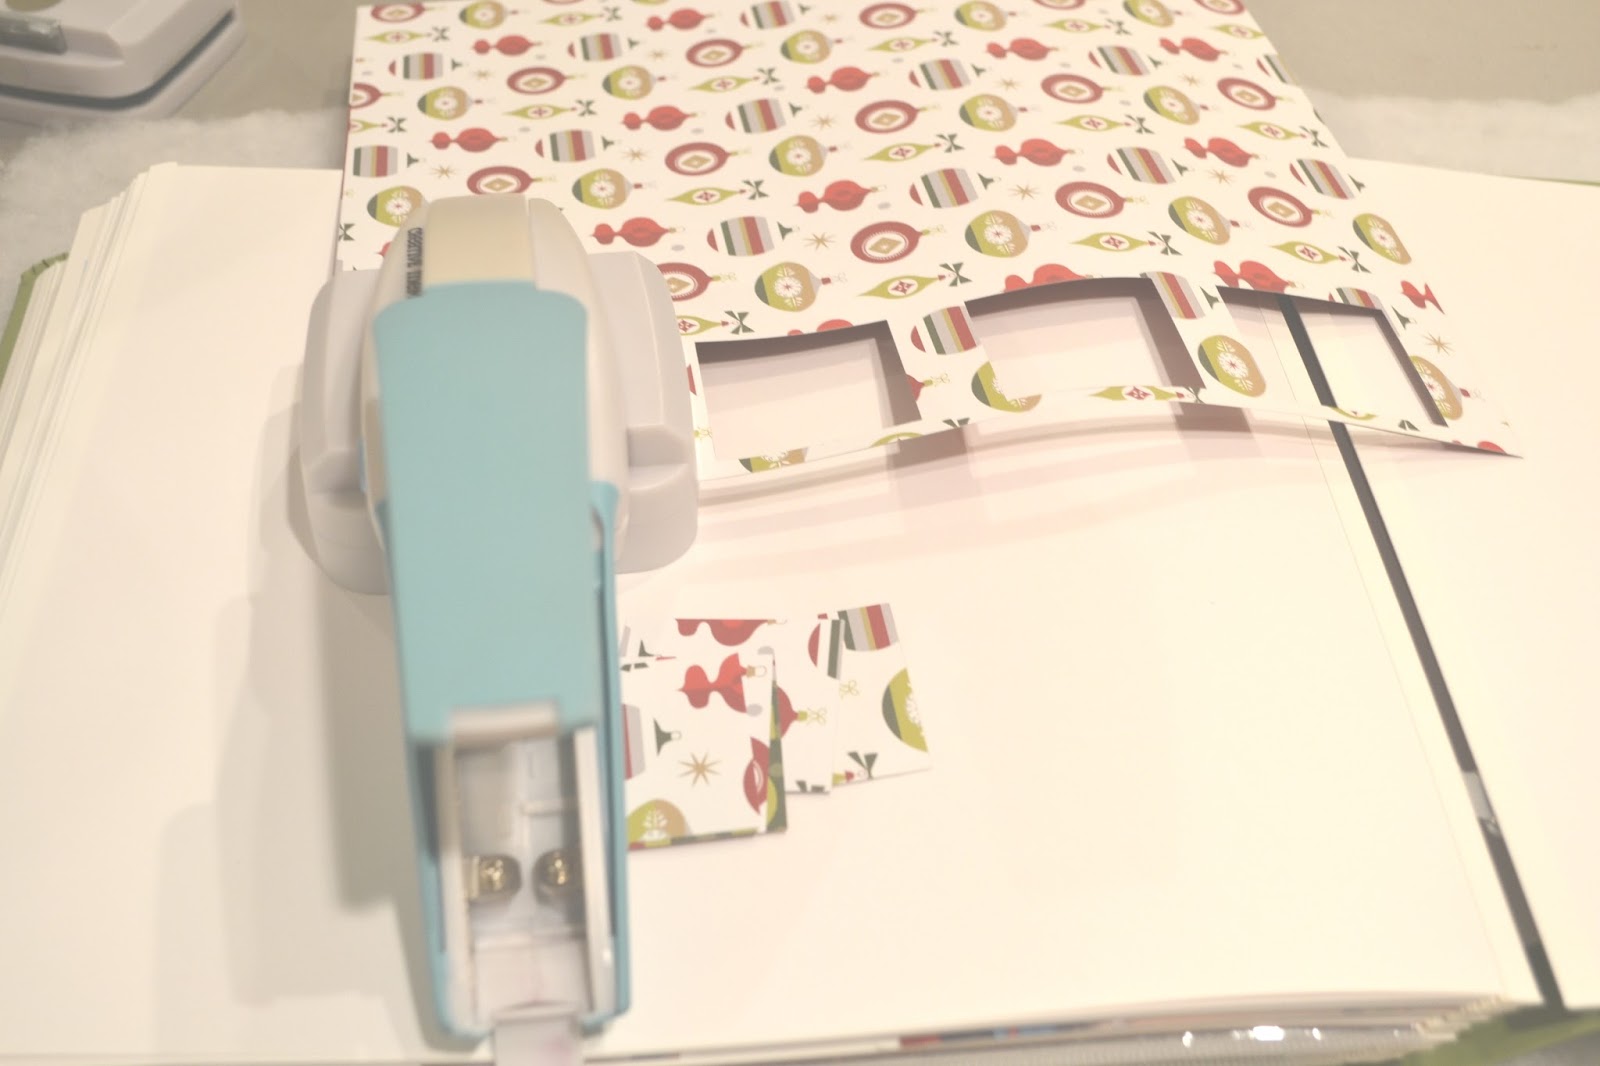
You will just need two different sheets of 12X12 double sided paper. Start by using the Shape Maker System with the Square punch (comes with the system)  to punch out four frames. Save the squares and repeat on a different design of  paper.


Using your straight trimmer slice the strips of frames into borders, then adhere each border to the sides of your layout. Arrange your squares in a decorative fashion on your pages, and create mats out of the rest of your paper.


Your frames will not go to waste! You can use the Square cartridge of the shape maker system to punch out faces and decorations from your favorite holiday photos and they will fit right into the squares! In this way, you can actually feature 6 photos on each page of this double sided layout. Isn't that fun?


 3.) A Simple Christmas Tree Using Circles and a Square!

I love our new Evergreen cartridge! The Border Maker System is exciting because Creative Memories keeps coming out with fun new additions to use with it. I also like our Shape Maker System (available under "Warehouse Finds" so get it while you can) because of the large Circle and Square shapes that come with it. I used each on this simple layout to make the trunk and the "branches" of the Christmas tree, and I topped it off with a large start using our Star Place 'n Punch tool (also available under "Warehouse Finds".)  Using our Shades of Red cardstock and black ABC letters I was able to beautifully record the night the entire family went to the ballet last year. A fun, easy page that is easy to recreate with the right tools.

Use the Evergreen cartridge with the Creative Memories Border Maker System and the Circle and Square cartridges with the Shape Maker System to make this fun and easy page

I hope you have enjoyed these ideas and that you will be able to use them easily incorporate them into your pages! The next stop on this blog hop is Sarah Fitzgerald with some wonderful holiday page layouts. If you started here on CelebratingYourBeautifulLife but you would like to see all of the CM Content Contributors' ideas, here is the full list of blogs (and as always don't forget to check out the CM Blog for fabulous ideas - it has been a stellar week for them!)

Have fun, happy holidays and keep scrappin'! Fran


Saturday, October 24, 2015

Digital Sale and New Updates at Forever!

Greetings to all of my digital friends! I have a lot of exciting news for you today, not the least of which is a 25% off sale on Historian (formerly Creative Memories' Memory Manager) that goes on until Tuesday, October 27th! If you go to the banner on the right hand side of my blog and click on the "Purchase Historian" banner you can use the code GetHistorian to knock 25% off of the price. Sweet deal!


You can also use the code GetArtisan to save $20 on Artisan 5 (formerly Storybook Creator.) This code lasts until October 31st so don't let it pass you by! You may have to do separate transactions to take advantage of both codes.


I have made so many wonderful projects (12X12 hardbound storybooks, 12X12 and 8X8 page prints, invitations, softbound books, greeting cards, etc...) in this software program that I find it to be as indispensable as Historian (my secret to keeping my 90,000 photos accessible and in order!) They go together like peanut butter and jelly!

 For those of you who already own the new versions of the software, did you know that yesterday they came out with great FREE updates for Historian, Artisan 4 and Artisan 5? You should be able to launch them from your software's start page - let me know if you need help. 

Please know that as of December 31, 2013 Storybook and Memory Manager have not been supported or updated so with every Windows upgrade (or with the possibility of your own computer running into trouble) you run the risk of losing what you have. I would strongly advise you to upgrade to the new Historian and Artisan software programs. Last summer I did it myself and was so pleased that I was able to do both seamlessly without losing my artwork, my photo descriptions or my folders!  If you have never owned either Historian or Artisan, now is a great time to get them!

Update on Forever

So now that we've gotten through the most important sale info, I hope you will stick around for another minute to learn about Forever. When Creative Memories filed for bankruptcy and came back as a leaner, simpler company, they decided not to pursue digital. Panstoria (the designer of Creative Memories' Storybook Creator and Memory Manager)  introduced an affiliate program for people like me who still wanted to support their folks who loved digital. Not long after that, Panstoria was purchased by Forever, the world's first permanent online cloud storage platform for your memories. 


I went to their conference in September and was blown away by their Forever Guarantee Fund and the insurance-like nature of their product. With three servers and full encryption, backed by an endowment, Forever is guaranteeing the availability of your photos (and soon videos and documents such as wills birth certificates, etc...) in the cloud forever with COMPLETE PRIVACY. You pay upfront or in installments and unlike Shutterfly, Facebook, DropBox, Google, and Flicker, there is no threat of your account being wiped out if you go "inactive" or them selling your info and shrinking your resolution. 

So now my best and favorite memories are in my Forever account - you can get your first 3 gigs for free (about 1000 photos) so I would encourage you to go to Forever.com to setup your account. If you want to add more storage or try out their other offerings I am now a Forever Ambassador so just enter my name when doing your transaction (I also have links right here on this blog under "My Favorite Things.") Thank you as always for your support of my small business so I can keep us all updated and up to speed.  

Forever is also offering an online project program (Forever Projects), media digitization (videos, scanned photographs and scrapbooks, etc...) and of course Historian and Storybook.  If you want to be an Ambassador yourself you have until October 31st to do so without buying a $149 starter kit (message me for details.) I am proud and excited to be a part of this company and sleep better at night knowing that I will have my best memories safe from fire, floods, computer crashes, EHD crashes, or websites such as Shutterfly or Facebook selling my information and shrinking the resolution of my images (not to mention wiping everything out to make room on their server should I not buy anything from them.) Forever is the future - please check them out! There are links to my Forever site under "My Favorite Things" -thanks as always for your support


Comment below if you need help with anything and as always keep scrappin'! Fran

Fran Smitherman, CM Advisor and Forever Ambassador


Helping people get their photos in order, in albums and permanently preserved since 2002! Whether you prefer traditional or digital albums or you simply want the security of knowing your memories have a permanent home in the cloud, I have solutions for you. 

Sunday, October 18, 2015

Halloween Blog Hop Stop #5

Welcome to Stop #5 of our Creative Memories Halloween Blog Hop! 

Isn't Halloween fun? I love being a part of this blog hop with my fellow CM Content Contributors - what a creative group of ladies! Today I am going to share some ideas I came up with a few months back that I hope you will be able to use yourself. My projects are pretty simple if you have the right tools (and I try my best to use scraps so nothing gets wasted!) Today we are going to work on some spooky Halloween faces and a two page layout featuring "Spooky Eyes." Let's get started!

Spooky faces using CM cardstock, the Shape Maker System and scraps from the Border Maker System's Film Strip cartridge  

A fun layout using CM cardstock, jewels from the Floral Embellishment kits, Gold ABC/123 letter stickers, and the fence that comes with the Border Maker System
1. Spooky Skeleton and Spooky Pumpkin

To get started, you will need the Custom Cutting System's mat and the green blade, a tape runner, and the Jumbo Hexagon Pattern. You will also need the Shape Maker System with the Square and the Fancy Circle cartridges and the Border Maker System with the Film Strip Cartridge. For paper I used our Shades of Bright and Shades of Neutral Cardstock packs to get my orange, black and white cardstock (one sheet of each.) Right now Creative Memories also has for a limited time 10 sheet packs of White and Black cardstock (not a bad idea - I know those are two colors I use a lot of!)

The CM custom cutting system, blades, mat and tape runner
                                      

Creative Memories tools: The Border Maker System and the Shape Maker System


"Shades of" cardstock packs and Flower and Jewel Embellishments


One sheet each of black, white and orange cardstock

Begin by using your Green blade to make the smallest hexagon possible with the inside of the Jumbo Hexagon Pattern. Do this with both the Orange (the pumpkin) and the White (skeleton) cardstock.


 Next, take your black sheet of cardstock and make two film strip borders. Save the scraps!


Finally, using the Shape Maker System and the rest of your sheet of black cardstock, make four Fancy Circles and two squares. Cut the squares in half to make triangles.


Assemble the pieces you have cut as follows - the Fancy Circles are the eyes, the triangles are the noses and the cheekbones, and the rectangles that were the scraps from the film strip cartridge border become the mouths. Adhere with your tape runner and voila, you have a Spooky Skeleton and a Spooky Pumpkin!

Spooky faces using CM cardstock, the Shape Maker System and scraps from the Film Strip cartridge (used with the Border Making System)
 2. Spooky Eyes

My second project came from being the mother of two boys. I loved the paper flowers and the jeweled embellishments, but struggled with how I could use them for my pages. After staring at the adhesive jewels I realized they could be used as spooky eyes staring out from the dark and that is what I did to create this fun layout! I used a sheet of grey cardstock from the Shades of Neutral cardstock pack  - the black picket fence from the Border Maker system and the Gold ABC/123 letters as a title added a little something extra!


I hope you are enjoying all of these fun ideas for your Halloween pages.  Now it's time for you to go see what Diana has brewed up for you at Stop 6 on this Blog Hop, Diana Brinsley's blog. If you started at my blog but want to see the previous Halloween ideas, here are all the links:

Stop 3 Scrappinjpegs
Stop 4 LisasWorkshop


Enjoy the rest of the blog hop and as always, keep scrappin'! Fran